
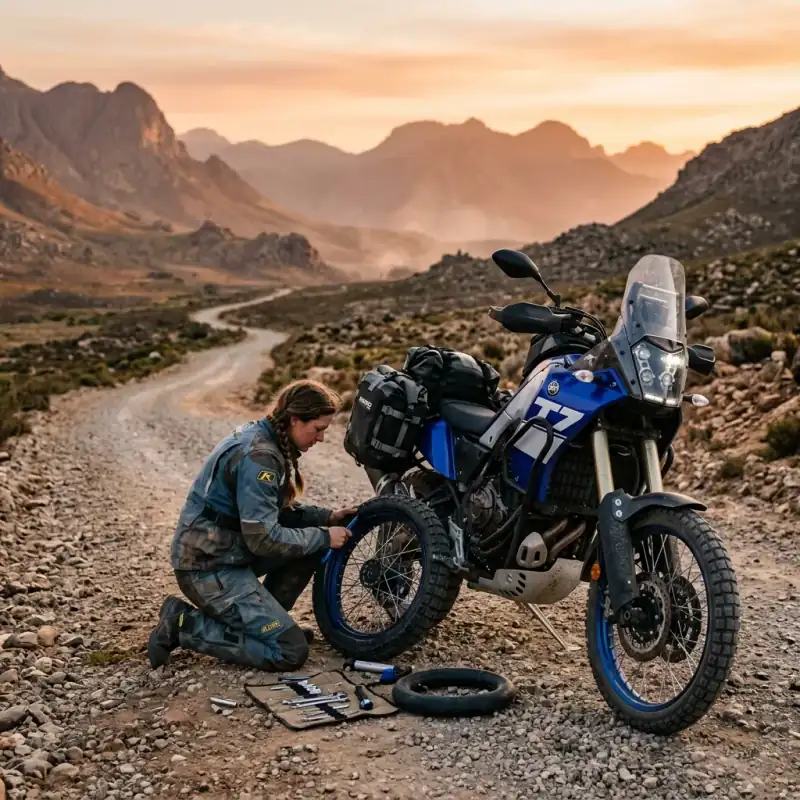
A breakdown far from a workshop is a different problem from one in town: what decides it is daylight, water, signal and what is already in your tool roll. This guide works through it on one bike, the Yamaha Ténéré 700, using the figures in Yamaha’s owner’s manual: what you can fix by the side of a track, what you can’t, and the tool kit that turns the common failures into a one-hour delay instead of a recovery truck. The kit section applies to most adventure bikes; the numbers are the T7’s, so check your own manual for yours.
Where a figure varies between model years, it is marked as such.
The Mindset: Limp-Home, Not Concours
The single most useful idea in field repair is that you are not trying to fix the bike properly. You are trying to restore enough function to ride it carefully to a place where it can be fixed properly. A repair that holds for 60 km of gentle riding is a complete success. A repair that’s perfect but takes four hours of daylight you don’t have is a failure.
That distinction decides what goes in your tool roll and how you use it. You almost certainly won’t carry a torque wrench off-road. They’re heavy and only a handful of fasteners truly need one. So when the manual says a bolt wants a specific torque, the field reality is: snug it firmly by feel to a safe limp-home tightness, ride gently, and re-torque it to the real number at the next paved-road stop or workshop. The real torque figures are given throughout so you know the target, along with where “good enough to get home” is the actual goal.
One more thing the T7 won’t do for you: the bike ships with only a minimal tool kit in the compartment under the seat. It’s enough to wiggle a few fasteners, not enough for a serious field repair. Building your own kit isn’t optional on this bike.
Flats & Tubes — The Big One
The fact this guide is built around: the stock Ténéré 700 runs inner tubes.
The T7 rolls on spoked wheels, a 21-inch front and an 18-inch rear, and the stock rims are set up for tubes. That single detail changes how you handle the most common breakdown on any adventure trip. On a tubeless bike, a nail in the tread is a five-minute job: ream the hole, push in a sticky plug from the outside, re-inflate, ride away, wheel never leaves the bike. On a tube-type T7, a tubeless plug kit is useless. The air isn’t held by the tire sealing against the rim. It’s held by the tube inside. Plugging the tread does nothing.
So the real fix is the longer one, and you should know the shape of it before you ever need it:
- Get the wheel off the bike. Rear is the harder one. You’re dealing with the axle and the chain adjusters.
- Break the bead. The tire is clamped onto the rim by air pressure and a stiff carcass; you have to push the sidewall down off the rim’s bead seat. On a stiff dual-sport tire this is the hardest part: levering, kneeling on it, sometimes using the sidestand or a bead-breaking tool.
- Lever one side of the tire off with tire irons, working around the rim a little at a time, careful not to pinch the tube.
- Patch or replace the tube. A patch if the hole is findable and the tube is otherwise good; a fresh spare tube if it’s torn or the valve is damaged. Carrying a spare tube is faster and more reliable by the road than chasing a patch in the wind.
- Refit the tire, get the tube seated without pinching it, and inflate. A pinched tube means you did all that work for a second flat.
This is a real job. Even practised riders take the best part of an hour, and breaking the bead and levering a stiff ADV tire takes real effort. The first time you do it should be on your garage floor on a calm afternoon, not at dusk in a crosswind with the light going.
What that means for what you carry
Because the T7 is tube-type, your puncture kit looks different from a tubeless bike’s:
- Two or three sturdy tire irons (levers); a single lever fights you the whole way.
- A spare tube, sized correctly for the 21” front and the 18” rear. Some riders carry one tube that can get them home on either end in a pinch; better is one of each if you have the space.
- A patch kit as backup to the spare.
- A way to break the bead — at minimum strong levers and technique, ideally a compact bead-breaking method you’ve practised.
- A real pump. A 12V compressor off the battery inflates a tire in a few minutes; a hand pump works but is hard graft after a long day. Either way, you need to get back to the cold pressures the manual specifies (more on those below).
- A valve-core tool and a spare valve, cheap and tiny.
The field tool kit section below covers the whole roll. Two items worth a direct mention:
Disclosure: some links below are affiliate links. If you buy through them we may earn a small commission at no extra cost to you.
Check Motion Pro Tire Irons on Amazon →
Check the AstroAI 12V Inflator on Amazon →
The pressures, set cold
Set these with the tire cold, every time — heat from riding inflates the reading and you’ll end up under-pressure. From the manual:
| Use | Front | Rear |
|---|---|---|
| Road (solo or with passenger) | 220 kPa / 2.20 bar / 32 psi | 250 kPa / 2.50 bar / 36 psi |
| Off-road | 200 kPa / 2.00 bar / 29 psi | 200 kPa / 2.00 bar / 29 psi |
Stock rubber from the factory is the Pirelli Scorpion Rally STR (front 90/90-21, rear 150/70 R18), with the Michelin Anakee Wild as an approved alternative fitment in the same sizes. Both run with tubes on the stock wheels.
”Should I just go tubeless?”
Plenty of T7 owners get tired of the wheel-off ritual and convert. Your options, presented as owner choices, not stock:
- Tubeless conversion kits that seal the spoked rim so it holds air without a tube; then a trailside plug actually works.
- Aftermarket sealed tubeless wheels.
- Heavy-duty tubes or a mousse insert to reduce puncture frequency (a mousse trades the puncture problem for a stiffer ride and a harder fit).
No prices or specific kits here: they vary by market and change often. The point is just to know the menu exists. Out of the box, plan around tubes.
Chain — Check It, Adjust It, Carry the Link
After punctures, the drive chain is the next most likely thing to need attention on a loaded ADV bike, and it’s one of the easier wins by the road.
Slack. The T7 wants 43.0–48.0 mm of slack, measured at the end of the drive chain guard, with the bike upright and no weight on it, transmission in neutral. Too tight is worse than slightly loose — a chain pulled drum-tight stresses the gearbox output bearing and the rear shock travels through its stroke yanking it tighter still. Adjust at the swingarm adjusters and keep the alignment marks equal on both sides so the rear wheel stays square; a misaligned wheel eats the chain and the tire and makes the bike track oddly.
The torque numbers. Done properly, the rear axle nut is 105 N·m (77 lb·ft) and the adjuster locknuts are 16 N·m (12 lb·ft). Out on a track you won’t have a torque wrench. The field reality: tighten the axle nut as firmly as you can with the tools in your roll. That big axle nut wants to be properly tight — ride gently, and re-torque to 105 N·m at the next opportunity. This is exactly the limp-home-versus-proper distinction: get it safe enough to roll, fix it right when you can.
Cadence. Clean, lube, and re-check slack and alignment every 1,000 km (600 mi), and again after rain, water crossings, washing, or a hard off-road day. Grit shortens that interval in practice; many riders re-lube mid-day after a dusty section.
The catastrophic version. A chain that’s thrown or snapped — usually a stone wedged between chain and sprocket, yanking it sideways off the teeth — leaves the bike dead still. This is why a 525 master link belongs in the spares bag: the T7’s chain is 525 size (Yamaha’s spec is 525VZ2), so the spare link must match. With a chain breaker and a spare link you can rejoin a chain by the road; without them, a snapped chain is the end of the ride until recovery. If the chain is merely damaged rather than broken, sometimes the limp-home move is to remove the bad link and run a slightly shorter chain very gently to the next town; ugly, but it rolls.
Check Motion Pro Chain Tools on Amazon →
Fasteners & Vibration — The Quiet Killer
Nothing dramatic happens here, which is why it strands people. A long ADV trip is hours of vibration and corrugation, and bolts back themselves out a fraction of a turn at a time until something falls off or starts knocking. The fix is boring and effective: know which fasteners loosen, check them, and use threadlocker where it belongs.
On a loaded T7, the usual suspects:
- Sprocket bolts (front and rear); high-consequence if they walk out.
- Subframe and luggage-rack hardware; racks and pannier frames carry weight over bumps and work loose.
- Bash plate / skid plate bolts; directly in the firing line of vibration and impacts.
- Footpeg, lever-pivot, and brake-caliper-mount hardware; anything that takes repeated load.
Carry medium-strength (blue) threadlocker and put a drop on the vibration-prone threads — bolts that should stay put but that you might still need to remove later. Avoid high-strength (red) in a field kit; it often needs heat to break loose and you won’t have a torch on a trail. A two-minute walk-around with your tool roll at the morning fuel stop, hand-checking the bolts above, catches most of this before it becomes a repair.
A bash plate that protects the cases is one of the most useful upgrades on this bike, along with the radiator guard covered below. Both are bike-specific: buy one made for the T7 and its model year.
Levers, Controls & Crash Damage
Drop a tall adventure bike on loose ground and the damage is usually the same short list: a snapped clutch or brake lever, a bent shift lever, a cracked hand guard, a broken mirror. None of it stops the engine. All of it can stop you if you’re not carrying the bodge kit.
- A snapped clutch or brake lever is the classic. A spare lever weighs nothing and turns a trip-ender into a five-minute swap. If you didn’t bring one, a lever snapped partway can sometimes be filed smooth and ridden carefully — a stub of clutch lever is enough to feather the clutch to the next town if you’re gentle. The clutch lever free play, for reference when you set up a new one, is 5.0–10.0 mm.
- A bent shift lever can often be bent back with a bit of leverage against a rock or the bike itself — careful, cold metal cracks. Enough to select gears is enough to get home.
- Broken guards and mirrors are cosmetic until a sharp edge is flapping into a control. Zip-tie or tape it out of the way.
Most crash aftermath is handled by the small bodge kit in the tool kit section: zip ties, tape, wire and a multi-tool with real pliers. Wire lashes a broken bracket to the subframe; tape covers a smashed lens.
Electrical No-Start Basics
When the starter does nothing, the instinct is to fear the worst. Usually it’s something dumb and free. Work the simple causes before you panic, and keep your diagnosis general. There is no fuse map here on purpose: ratings and locations vary by model year, so read your own manual.
The common no-start culprits on a bike like this:
- The kill switch. Bumped to “off” in a drop or while fussing with gloves. Embarrassing how often this is it. Check it first.
- The sidestand switch. The bike won’t crank in gear (or sometimes at all) with the stand down, and a bent, muddy, or unplugged sidestand switch after an off can mimic a dead bike. Stand up, neutral, try again; inspect the switch if it persists.
- A blown fuse. Carry the spare fuses your manual lists, and know where the fuse box is before you need it in the dark. A spare fuse is grams and pennies; a blown one with no spare is a tow.
- The battery. A weak or flat battery cranks slowly or only clicks. Connections corroded or loose? Clean and tighten. Don’t plan around a bump-start or a jump: Yamaha’s Ténéré 700 owner’s manual prints neither procedure and says to have a discharged battery charged, so carry a multimeter to check it and a way to charge it instead.
- A fall. The T7’s lean-angle sensor stops the engine in a turnover, and Yamaha says the bike will crank but not start until you turn the power off and back on.
The full symptom-first order, with the voltage numbers and what other makers say about jump-starting, is in our motorcycle won’t start guide.
Fluids & Cooling
You rarely repair fluids on the trail, but you check them, and you avoid making a hot day worse.
- Engine oil. The T7 takes SAE 10W-40, API SG or higher, JASO MA. The JASO MA part matters: avoid “Energy Conserving” oils and diesel “CD+” specs, because the wet clutch can slip on them. Engine and gearbox share the same oil. Capacity is 2.30 L for an oil change without the filter, 2.60 L with the filter cartridge. On the trail you’re just checking the level at the sight glass and topping up if it’s low; carry a small amount on a long remote trip.
- Coolant. Yamalube coolant, or an ethylene-glycol antifreeze suitable for aluminium engines mixed 1:1 with distilled water; reservoir is around 0.25 L, the full system about 1.60 L, changed every 3 years. The thing that matters off-road: the radiator is exposed and gets hit by stones and branches, which is exactly why a radiator guard is worth fitting before a rough trip. And the safety rule, no exceptions: never open a hot radiator cap. Let it cool, drape a rag over the cap, and release the pressure slowly. Coolant under pressure scalds.
- Brake fluid. DOT 4, both ends, changed every 2 years (hoses every 4). Don’t mix fluid types. Trailside, you’re checking the level and the pad thickness, not bleeding brakes in the dust.
- Spark plug. For reference if you carry a spare: NGK LMAR8A-9, gapped 0.8–0.9 mm, torqued to 13 N·m — or about a quarter to half turn past finger-tight if you’ve no torque wrench.
The Field Tool Kit
The T7’s stock under-seat kit is minimal, and the same is true of most adventure bikes: build your own. The kit is not meant to restore the bike to factory condition. It is meant to restore enough function to ride carefully to the next village or workshop, and every item earns its place by answering one question: does this turn a stranded bike into a moving one?
Hand tools: match them to your bike
Walk round the bike at home and note the size of every fastener you might need in the field — axle and caliper bolts, sprocket bolts, the oil drain, exhaust hangers, footpeg mounts, lever pivots — and carry those sizes and no others. Japanese bikes mostly use 8, 10, 12, 14 and 17 mm; European bikes add Torx on bodywork and brackets. A full socket set is mostly weight you never use.
- T-handle with the sockets your bike needs (8, 10, 12 and 14 mm is a common set)
- Folding hex key set
- Folding Torx set if your bike uses them
- Multi-tool with real pliers and a wire cutter
- Small adjustable wrench for the odd fastener
- Two or three tyre spoons, ideally one with an axle-nut ring so you don’t carry a large axle socket
Choose a multi-tool on its pliers rather than its blades: field repairs that need one are usually electrical (cutting and crimping wire) or a stripped bolt head.
Puncture kit
Tube or tubeless decides everything, and the stock T7 is tube-type (the list is under flats, above). For a tubeless bike, or a T7 converted to tubeless: a plug kit, which fixes most tread punctures with the wheel still on. Either way, a 12V compressor beats a hand pump after a long day, and a separate pencil gauge confirms the reading. The step-by-step for both jobs is in the roadside flat tyre guide.
Stop & Go Tubeless Repair Kit (tubeless only) — Check Price on Amazon →
Bodge kit and spares
The small-parts pouch that covers what tools can’t:
- Heavy-duty zip ties, assorted: cracked pannier mounts, a flapping fender
- Duct tape wrapped on a pencil rather than a full roll
- Two-part steel epoxy in a syringe: a stripped thread, a cracked bracket; it needs hours to reach full strength, so treat it as a get-home fix
- Medium-strength blue threadlocker; never red in a field kit, it needs heat to undo
- A spare master link matched to your chain (525 on the T7), plus a chain breaker
- Safety (bailing) wire, a small spool
- Spare fuses from your manual’s list
- Spare clutch and brake levers in a separate bag
All in, tools, puncture kit and spares weigh a few kilograms. Carry them at the bottom of a side pannier, low and central; the same weight in a top box raises the centre of gravity and makes every slow turn harder. To check the load and its balance, run it through the Pack My Bike tool.
Use every tool once at home
The common failure of a tool kit is not a missing tool but one you have never used. Before a long trip, break and rejoin the chain with the master link, take a wheel out and refit it using only what is in the roll, inflate a flat tyre with the compressor and loosen a few bolts with the T-handle. Each takes minutes and shows which items are missing, undersized or don’t fit your fasteners.
A starter kit is a faster way in than buying piecemeal:
Check CruzTOOLS Road Tech Kits on Amazon →
If you’re still deciding whether the T7 is your bike for this kind of riding, the Ténéré 700 vs Africa Twin comparison covers how it behaves loaded and off-road.
The Jobs That Are NOT Roadside Jobs
Some maintenance is a workshop or careful-home task, and pretending otherwise gets people stranded doing the wrong thing in the wrong place. On the T7, do these before you leave, not on the trail:
- Valve-clearance checks. On the CP2 engine this means removing the fuel tank and the airbox and measuring shims, not a job you do kneeling by a track. Published intervals vary, so verify it against your own model-year maintenance chart rather than trusting a single figure.
- Throttle-body synchronisation. A balancing job with gauges, done in a workshop.
- Air-filter service. The airbox sits under the fuel tank, so swapping the disposable paper element is a tank-off job — fine in a garage, not on a trail. Inspect and replace more often in dusty conditions, but plan it as a before-you-go task.
For reference on the scheduled side: first service at 1,000 km, then majors every 10,000 km up to 50,000 km before the cycle repeats, with annual checks of brakes, lights, clutch and diagnostics. Get the big jobs done before a remote trip and the tool roll only has to handle the surprises.
Where Field Reliability Actually Gets Tested
Self-sufficiency matters most on long, thinly populated routes where the next workshop is a day away. If you’re planning that sort of riding, the Turkey TET section of the Turkey guide is exactly the terrain where carrying the right tube and a master link stops being optional, and the wild camping in Turkey guide covers staying out there comfortably once you’ve made camp. For everything you sleep under and cook on, the motorcycle camping gear checklist is the companion to this one.
In short: on a stock T7 the flat is a tube job, not a plug; the chain wants a 525 link; the torque numbers are the target, not the trailside requirement; and the jobs that aren’t roadside jobs get done in the garage before you leave.
A note on the links above: some are affiliate links, and if you buy gear through them we may earn a small commission at no extra cost to you. It helps fund the research behind these guides. Every T7 figure in this article is drawn from the Yamaha Ténéré 700 owner’s manual; where a figure varies between model years, the text says so. Always cross-check torque values and intervals against your own bike’s manual before you wrench on it.
Frequently Asked Questions
Can you fix a Ténéré 700 flat with a tubeless plug kit?
No — not on a stock bike. The T7's spoked 21-inch front and 18-inch rear wheels are set up for inner tubes, so a plug pushed into the tread does nothing because the air is held by the tube inside, not the tire-to-rim seal. A real roadside fix means getting the wheel off, breaking the bead, levering one side of the tire off, and patching or swapping the tube. Some owners convert to a sealed tubeless rim setup or run heavy-duty tubes or a mousse, but those are aftermarket choices, not how the bike leaves the factory.
What chain does the Ténéré 700 use and what's the correct slack?
The T7 runs a 525-size chain (Yamaha specs it as 525VZ2), so carry a 525 master link as your spare. Slack is 43.0–48.0 mm measured at the end of the chain guard with the bike off its stand, no weight on it, and the transmission in neutral. Adjust at the swingarm adjusters and keep the alignment marks equal on both sides. Always verify the figure against your own model-year manual.
What's the realistic goal of a trailside repair far from help?
Limp-home, not concours. The aim is to restore enough function to ride carefully to the nearest village or workshop, not to produce a perfect factory repair on the side of a track. You almost certainly won't have a torque wrench in your tool roll, so you fasten by feel to a safe limp-home tightness, ride gently, and re-torque properly to spec at the next real stop.
Which Ténéré 700 jobs are NOT roadside jobs?
Valve-clearance checks, throttle-body synchronisation, and air-filter service. On the CP2 engine the airbox sits under the fuel tank and valve work needs the tank and airbox off plus shim measurement — that's a workshop or experienced-home job. Do these before a big trip, not on the trail. Treat the valve-check interval as 'verify against your model-year maintenance chart' because published figures vary.
What should I service on a T7 before a remote trip rather than on the road?
Set the chain slack and lube it, check tire condition and cold pressures, confirm brake-pad thickness and DOT 4 fluid level, top the engine oil to the sight glass, check the coolant, replace a dirty air filter, and confirm your spares actually fit your bike. Pre-trip prep is where you prevent the breakdowns; the tool roll is only for the ones you didn't catch.